Replacing a CV Joint – or Not? Why CV Joints Can Be So Complicated…
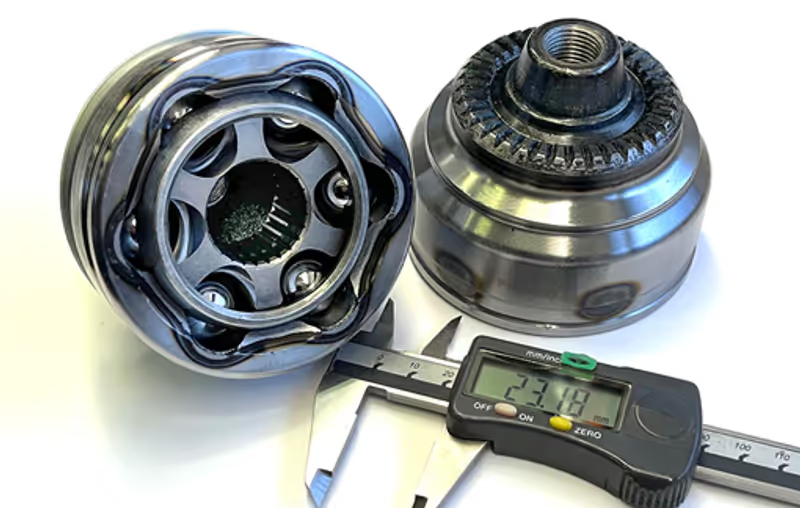
Finding a CV joint available as a separate spare part for a drive shaft is never a given; in fact, it is often impossible even to obtain technical data detailing which specific CV joint is fitted to the shaft. Almost without exception, the CV joint must first be removed from the car so you can count the internal splines before you are able to order the correct replacement.
Out of all car manufacturers on the market, only the VAG group assigns individual OEM part numbers to CV joints and lists them as standalone spare parts in their catalogues. For this reason, we can set Audi, SEAT, Škoda, and Volkswagen aside in this context, although even within VAG there are still several CV joints that cannot be purchased separately.
At this point, many who have successfully replaced a CV joint on various other makes might object. Of course, it is possible to replace CV joints on a wide selection of drive shafts across different car brands. For many shafts, individual CV joints are available on the aftermarket, and many have been accurately identified. Outside the VAG ecosystem, however, an individual joint remains an unlisted and non-guaranteed replacement part.
Allow us to explain why and clear up the confusion.
Consider what happens when a car manufacturer orders a drive shaft from various driveline component manufacturers – because nobody actually believes car makers produce their own drive shafts, right? Carmakers typically commission drive shafts from several different factories and suppliers, frequently spread across multiple continents. This depends on where the vehicles are assembled and ensures continuity of supply against potential logistics delays, industrial action, or component shortages.
When the car manufacturer places an order for a drive shaft, they provide technical engineering drawings detailing exact dimensions, manufacturing tolerances, geometry, and operational specifications. The definitive factors are always the number of splines, dimensions, and machining at both ends of the shaft, the sealing ring contact surface, and the operating length of the shaft.
Crucially, this specification does not dictate the internal design of the inner or outer CV joint. Consequently, suppliers around the globe use their own proprietary shaft blanks and internal components. As a result, drive shafts can look visibly different: one manufacturer might use hollow tubing for the shaft, another cold-drawn solid steel, and a third forged steel. Naturally, regardless of the manufacturing method, both performance and structural strength remain identical.
Now, almost anyone can see why a CV joint that is not catalogued as a unique spare part differs from one shaft supplier to another – even when designed for the exact same vehicle. This is precisely why car manufacturers cannot specify which individual CV joint fits their drive shafts. To be frank, manufacturers also have little commercial interest in supplying sub-components; selling a complete drive shaft avoids substantial compatibility issues.
To make matters more complex, there are numerous drive shafts on the market where the outer CV joint is permanently assembled and physically impossible to replace, as seen on various BMW, Volvo, Toyota, Subaru, and especially Renault models. Finding a replaceable inner CV joint – or even locating one sold individually – is rarer still.
Why, then, is the market flooded with individual outer CV joints for almost every conceivable vehicle? The answer comes down to three factors: First, customers demand the simplest and cheapest fix – even if it ends up being neither. Second, component factories that have manufactured a CV joint naturally want to maximise production volume once tooling is set up. Third, widespread market assumption that "there must be a separate CV joint for this shaft" drives persistent demand for loose parts.
At CVJoint24, we are continuously refining our stocked range of individual CV joints. The simple reality is that holding inventory for countless unique joints for every single drive shaft has become unsustainable, especially when every engine code, gearbox code, and power output requires entirely distinct drive shafts.
Certain modern vehicle models require 25 to 30 completely different drive shafts for the exact same car, determined entirely by engine code, gearbox code, and chassis splits.
Driveline maintenance was significantly simpler years ago when a model offered only a single manual gearbox and perhaps an automatic option. Frequently, identical drive shafts were used irrespective of the transmission. Yet, even back then, dismantling a drive shaft to replace just the CV joint was rarely standard practice…
Unless you are working on a VAG vehicle and want to save yourself considerable time and hassle, replacing the complete drive shaft is almost always the most sensible route.
Most importantly: as soon as a CV joint starts making noise, replace it without delay. Much like driving on a flat tyre, continuing to drive will only cause further damage. A failing CV joint will not fix itself. Nor can it be cured with fresh grease and a new CV boot once excessive wear has set in. Postponing the repair risks severe mechanical failure: total loss of drive leaving you stranded, heavy play that strains the opposing drive shaft, or unnecessary internal wear on your gearbox.
When Replacing a CV Joint, Do It Properly
- Always verify the replacement first: test-fit the joint carefully onto the splines of the drive shaft to confirm exact sizing and fitment. Never apply grease until you are completely certain you have the right part.
- Cleanliness is critical: keeping your work area pristine prevents dirt, grit, and foreign debris from contaminating the new CV joint. Always assemble parts on a clean workbench after thoroughly degreasing the shaft and mating components.
- The supplied grease is adequate, but using a premium-grade grease will significantly extend the lifespan of the constant velocity joint. For track-day or motorsport use, always upgrade to a specialised racing grease engineered with a high drop point to withstand extreme operating temperatures.
- Pack the grease thoroughly inside the CV joint – never simply dump it into the CV boot. Grease cannot migrate from the boot into the rotating joint. Work the grease deeply into the ball tracks and cage, rotating the joint by hand until all contact surfaces are thoroughly coated.
- Always use the supplied stainless steel ear clamps, and never substitute them with standard hose clips or cable ties.
- Tension the clamps using dedicated CV boot clamp pliers to the correct setting – never attempt to crimp them using pincers, wire cutters, or water pump pliers.
- Ensure the CV boot is fitted with the bellows sitting naturally, evenly spaced, and free from twisting or pinching.